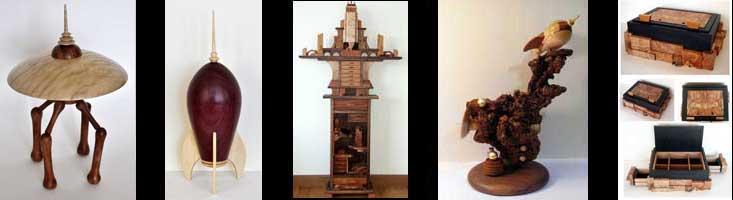
MAKING A SPACESHIP-STYLE ROCKET

Introduction
This ia very simple, straightforward rocket blank design. The keys to success are making the blank's center layer wood strips exactly the same thickness and making sure the blank is lined up exactly on center. Do a test of your headstock and tailstock alignment and shim them if necessary, or the pattern turned in the spaceship will look "off".
Woodworking is an inherently dangerous activity. The non-woodworking techniques described here aren't all that safe, either. Sharp tools, powerful motors, big lumps of wood, chemicals, fumes, etc. can cause you serious bodily injury or even death. These pages are NOT meant as a substitute for instruction by a qualified teacher, just as an illustration of how I do certain things. I take no responsibility for any mishaps you may experience during a fit of inspiration. You've been warned.
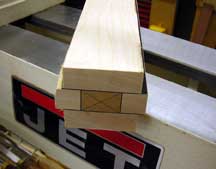
Photo 1
The spaceship starts with a blank glued up from contrasting wood and veneer. In this case, I used maple and mahogany with dyed black veneer. The maple, mahogany and veneer strips in the center layer MUST be the same height or the spaceship wont look right when its turned.
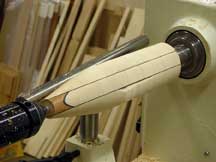
Photo 2
The blank, mounted between centers on the lathe and partly turned. You can see the nose cone feature starting to emerge from the blank.
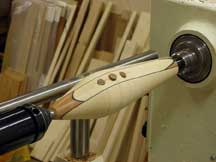
Photo 3
The spaceship, rough turned and with the walnut dowels that will become the portholes inserted into drilled holes. Since walnut dowels are readily available in a variety of sizes, I opted to use commercial dowels instead of turning my own. Note, however, that commercial dowels are not always the size they claim to be, they can vary quite a bit.
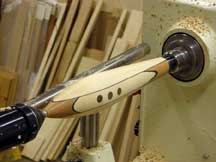
Photo 4
The spaceship, finish turned and sanded. I went to P800 grit sandpaper and then buffed with ultrafine synthetic steel wool. Synthetic steel wool comes in different colors that indicate its grade. Grey is equivalent to 0000 steel wool. The ultrafine white pads are equivalent to 000000 steel wool.
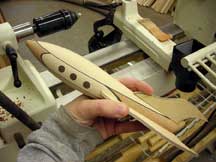
Photo 5
Here, Im testing the look of the fins I want to use with the spaceship. The tail fin is just a smaller version of the wing fins.
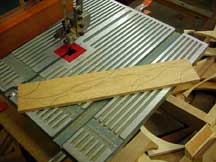
Photo 6
These are the fins, drawn onto a thin sheet of mahogany and ready to cut out on the bandsaw. Note that I line up the edge that will be along the spaceship body with the straight edge of the wood. Im also careful to align the grain so both wings and the tail fin will look the same.
After cutting, Ill sand the curved edges and hollow out the straight side to match the spaceship.
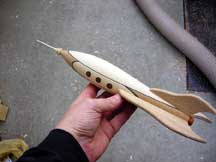
Photo 7
The spaceship, with the fins, aerospike and engine cone attached, but not yet mounted on its base.
Picking the base is an art in itself. The type of base you choose will affect the feeling the completed piece has. I wanted the finished piece to have a fast, swooping feel to it, so I chose the base accordingly.
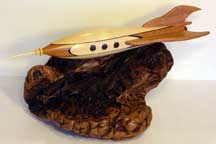
Photo 8
The manzanita root base has a tilt to it, echoing the implied motion of the spaceship.
Cruisin (2007)
Photo 9
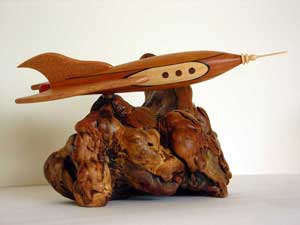
Another example.
Whoosh! (2007)
mahogany, maple, dyed black veneer, manzanita root.