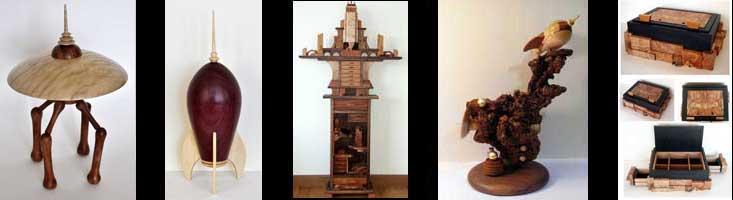
MAKING A CHECKERBOARD ROCKET

Introduction
The tricky parts with this rocket are making the strips of wood in the checkerboard exactly the same width and thickness, keeping everything aligned properly while gluing up the rocket body blank, and aligning the lathe's head- and tailstock so the pattern doesn't "drift" off to one side during turning.
Woodworking is an inherently dangerous activity. The non-woodworking techniques described here aren't all that safe, either. Sharp tools, powerful motors, big lumps of wood, chemicals, fumes, etc. can cause you serious bodily injury or even death. These pages are NOT meant as a substitute for instruction by a qualified teacher, just as an illustration of how I do certain things. I take no responsibility for any mishaps you may experience during a fit of inspiration. You've been warned.
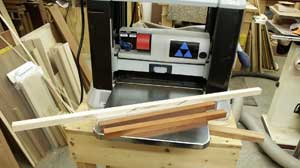
Photo 1
Assuming you've already sketched your design, building a checkerboard rocket starts with the checkerboard components. In this case, I used strips of maple (light wood) and padauk (dark wood). The strips are planed so theyre square in cross-section. Running both sets of strips at the same planer settings ensures that the strips are all the same in cross-section dimension.
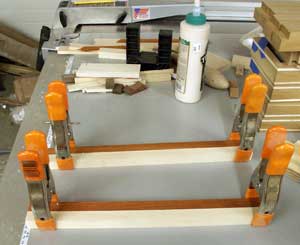
Photo 2
The planed strips are then glued up lengthwise, one maple strip to one padauk strip.
Good glue coverage is important so the joints dont fail later in the turning process. I use a brush to get a thin coat, even of glue on the joint surfaces.
Its also important that the strips dont shift relative to each other while theyre clamped, or the checkerboard wont form correctly.
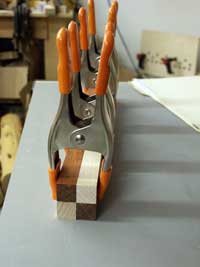
Photo 3
After cleaning off any glue squeeze out from the two-strip glue-up, arrange the layers as shown and glue the two layers together. Again, good glue coverage and good joint alignment are crucial.
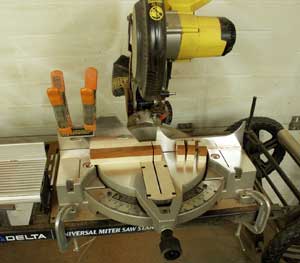
Photo 4
After the glued-up blank has cured, its off to the mitre saw to cut slices. I like to use slices that are about the same thickness as the individual strips. In this case, my strips were 3/4 x 3/4, so I cut 3/4 thick slices from the blank.
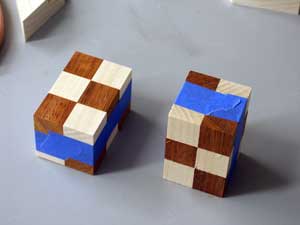
Photo 5
Layer the slices as shown, turning successive layers 90 degrees to the previous layer. Again, good glue coverage and joint alignment are crucial. At this stage, I like to use painters masking tape instead of clamps to keep things tight and aligned while the glue cures.
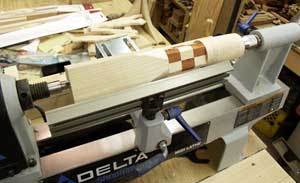
Photo 6
In this example, Ive glued the three-layer checkerboard in between two maple blocks. The maple blocks have been squared up so I can find the exact center in their ends, and Ive drilled center holes in the ends of the checkerboard blank and both maple blocks. Small dowels then keep the pieces aligned during glue up. Again, alignment is critical or, during turning, the checkerboard will ooze off one size of the rocket.
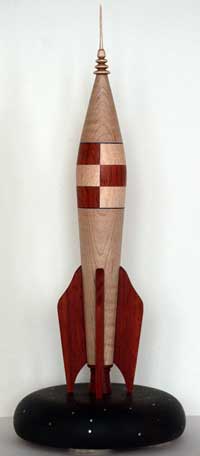
Photo 7
One example of a finished checkerboard rocket. In this example, I added layersof dyed black veneer between the checkerboard segment and the maple body blocks.
Rocket 2006-036 (2006)
Maple, padauk, dyed black veneer, ebonized walnut, wire.
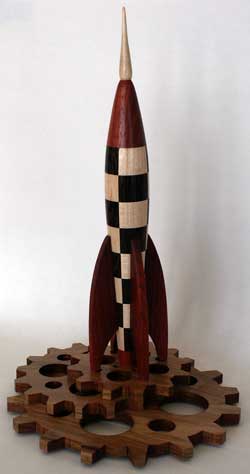
Photo 8
Another example. In this case, I used the checkerboard as most of the rocket body, with just a nose cone at the top and engine section at the bottom.
The checkerboard is maple (light wood) and wenge (dark wood), the nose cone and engine section are padauk.
Still Life With Gears and Toy Rocket II (2006)
Maple, wenge, padauk, butternut.
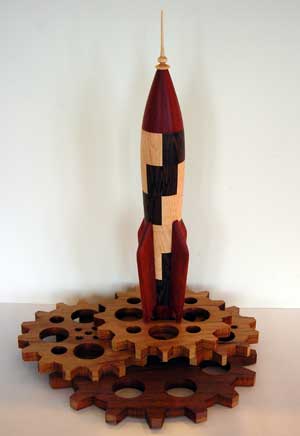
Photo 9
A third example. In this case, instead of turning successive layers by 90 degrees to the previous layer, I turned them only 45 degrees. This gives the spiral pattern. Again, I drilled center holes in each layer and used dowels to ensure alignment between successive layers.
The checkerboard is maple (light wood) and wenge (dark wood), the nose cone and engine section are padauk.
Still Life With Gears and Toy Rocket IV (2007)
Maple, wenge, padauk, butternut.