MAKING A FIVE-STAGE ROCKET BOX


Introduction
This rocket-shaped box has four compartments in five sections. Detailed preliminary design drawings and careful measurement during shaping are crucial.
Woodworking is an inherently dangerous activity. The non-woodworking techniques described here aren't all that safe, either. Sharp tools, powerful motors, big lumps of wood, chemicals, fumes, etc. can cause you serious bodily injury or even death. These pages are NOT meant as a substitute for instruction by a qualified teacher, just as an illustration of how I do certain things. I take no responsibility for any mishaps you may experience during a fit of inspiration. You've been warned.
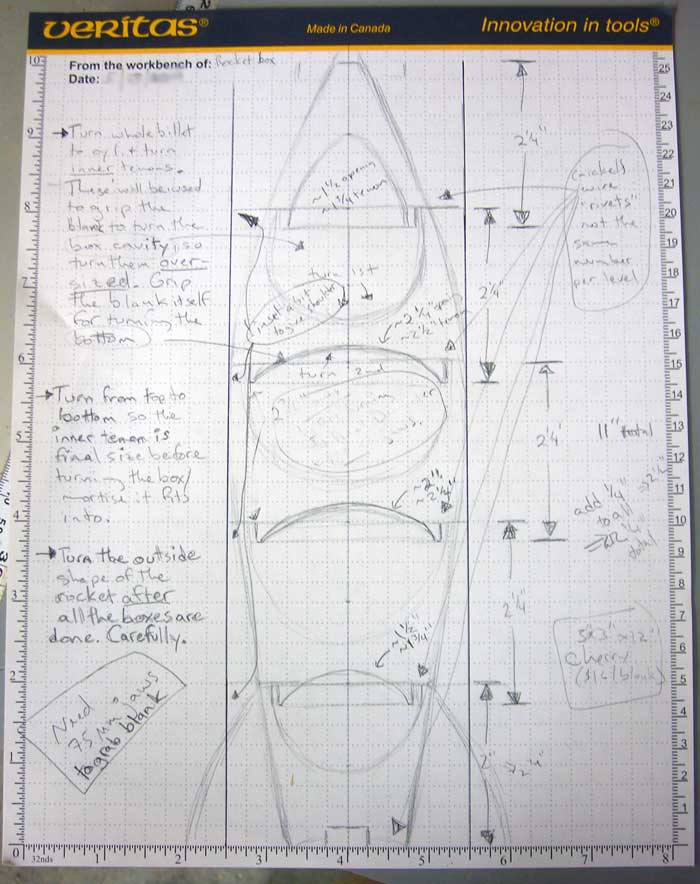
Photo 1
I found that a detailed scale drawing was essential for this rocket box. (To see a larger image of the drawing, use your browser's 'view image' command.) I needed to allow enough extra length for the tenons for each section, and figure out how large the individual compartments would be, since I would be turning them before turning the outer shape of the rocket. I had a piece of 3" x 3" x 12" cherry that I wanted to use for the rocket body, and that limited the maximum size for the rocket. I wanted the classic cigar-shaped rocket body. Each of the four lower stages of the rocket would act as both a box and as the lid for the box below it. The nose stage would serve as a lid only. Finally, I needed to figure out what order I would turn the stages in.
This is the procedure I settled on:
Step 1) Turn the blank to a cylinder and lay out the length of the stages according to the measurements in the drawing.
Step 2) Turn oversized tenons on the lid ends of the stages. These tenons will be used to turn the box part of each stage, and use the cylindrical blank itself to turn the
shallow lid section.
Step 3) Turn the stages in order from the nose stage to the tail stage and turn the box hollow before turning the lid hollow so the tenon on the lid end is turned to its final diameter
before turning the box it fits into.
Step 4) After all the boxes and lid hollows are turned, reassemble the stages in the proper order and turn the outside of the rocket
As usual, the devil is in the details.
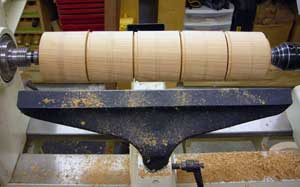
Photo 2
I mounted the cherry blank between centers and marked out the five stages of the rocket, then turned 1/4 inch long oversized tenons, plus a second tenon on the very top of the nose section. Since I wanted the grain pattern to line up in the final rocket, I marked each section with a set of identifying pencil lines: 1 line for the nose, 2 lines for the next stage, up to 5 lines for the tail section. Then I used a narrow parting tool to almost completely part off the stages, leaving the last bit to be cut apart off the lathe using a thin hand saw.
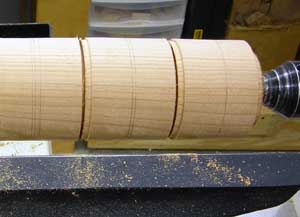
Photo 3
This close-up photo shows the stage identifying lines and the tenons more clearly. The gaps to the left of the tenons are where I've almost parted through with a narrow parting tool.
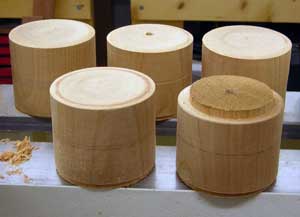
Photo 4
This picture shows the five stages of the rocket after cutting them apart.
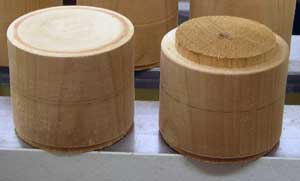
Photo 5
A closer view of the nose and second stages. The nose stage (right) has a tenon on the top also, which I used to grab the nose in a chuck in order to hollow it out. While I could have left the nose cylindrical and grabbed that cylinder instead of turning the extra tenon, having the tenon means I don't have to spend time fiddling with the alignment of the nose before hollowing it.
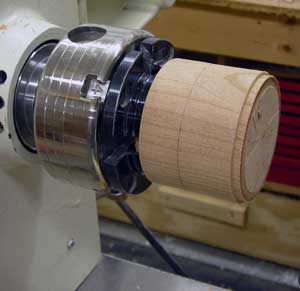
Photo 6
This picture shows the nose stage, mounted in the chuck. The identifying line is clearly visible, as is the oversized tenon.
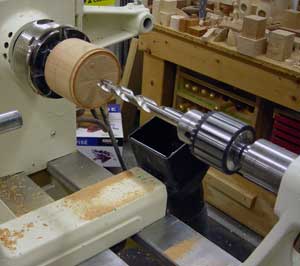
Photo 7
In this photo, I'm about to drill a half-inch wide hole in the nose stage. This hole will serve two purposes. First, it provides some clearance for shavings during hollowing. Second, it lets me know when I've hollowed to the depth I want. I leave the drilled hole about 1/8-inch shy of the actual depth I want to give myself a little room for finish cuts and sanding.
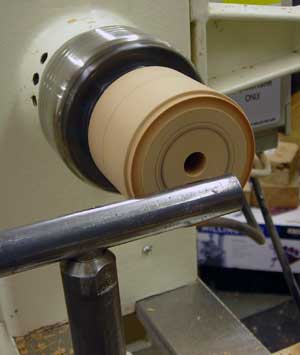
Photo 8
In this photo, I've marked what I want the final diameter of the tenon to be. I'll hollow out the nose with gouges and scrapers. Keeping in mind that the final shape of the nose will be roughly conical, the hollow will also be roughly conical.

Photo 9
This photo shows the hollowed nose section, with the second stage mounted in the chuck by its tenon. The hollowed nose and its tenon have been sanded and finished. Using calipers, I'll take the diameter of the finished tenon from the nose and mark that on the second stage, then drill, hollow, sand and finish the box portion of the second stage.
Since the second stage is both box and lid for the third stage, the box section shouldn't go too deep because the lid section will also get a shallow hollow. This is where the drilled depth hole is really useful.
After the box has been hollowed and finished, I'll reverse the second stage in the chuck, gripping it by the cylindrical end to turn the lid portion. I'll turn the tenon to its final diameter and put a very shallow hollow in the lid, then sand and polish the tenon and lid hollow. The key during the hollowing process is to remember that the various stages ultimately will have different outer shapes. The box hollows need to stay within those bounds. The detailed drawing is extremely helpful for this.
I'll follow this same series of steps for the third and fourth stages, also. The tail stage needs only the box section turned, since it doesn't act as the lid for anything.
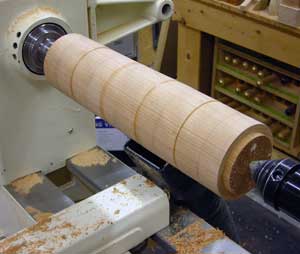
Photo 10
After all the box and lid sections and tenons have been hollowed, sanded and finished, I reassembled the sections between centers, in order, to turn the outer shape of the rocket.
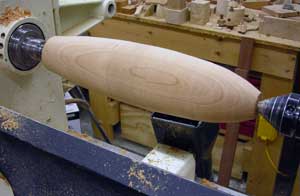
Photo 11
The outer shape of the rocket is starting to take shape. The stages may settle in a bit as material is removed, depending on whether the shoulders around the tenons are flat or sloped inwards. It's important to stop frequently and check that there's enough tailstock pressure to keep the stages together.
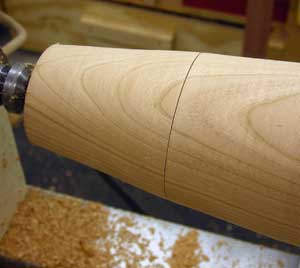
Photo 12
In this case, one of my tenon shoulders is slightly undercut and one of my lid tenons is now too deep for its recess. Oops. Time for plan B.
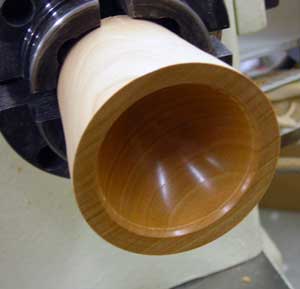
Photo 13
This photo shows how the finish in the box section got abraded by the now-too-long tenon. There's enough material left to turn off that I can grab this in the chuck and still be able to remove the marks. I'll re-sand and refinish the interior...
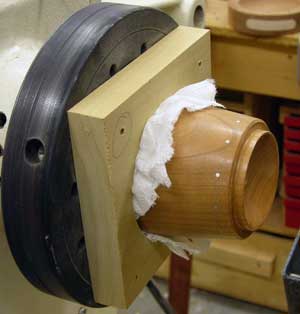
Photo 14
...then mount the lid stage in a jam chuck so I can re-turn and refinish the tenon. I'm using a jam chuck rather than the chuck here because I did this repair after finishing the rocket and I didn't want to damage the finished outer surface.
I made the hole in the jam chuck a little too big, so I used a couple of sheets of paper towel to tighten things up. Light cuts are the key to keeping the piece from flying out of the jam chuck.
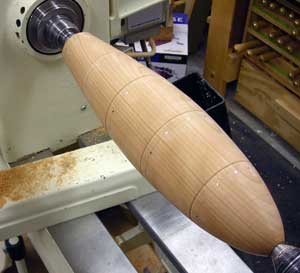
Photo 15
I've turned the rocket to it's final shape. I've also added decorative wire 'rivets' around the base of each stage.
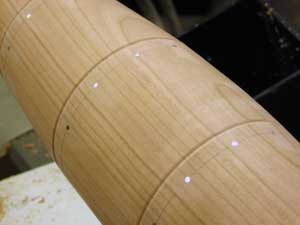
Photo 16
This is a close-up of the 'rivets.' Next up is final sanding and finishing.
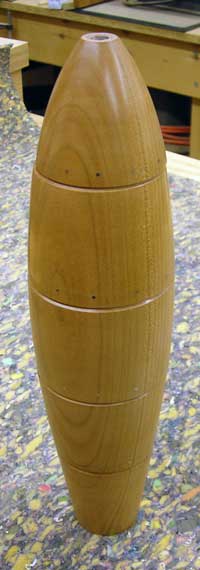
Photo 17
The five stages of the rocket, assembled. An engine, nose spike and fins will complete the project.
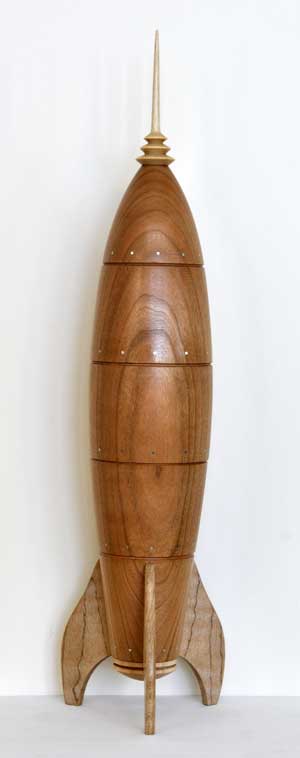
Five stage rocket box (2011)
Cherry, birch, maple, nickel, blue paua shell. Approximately 15" H.
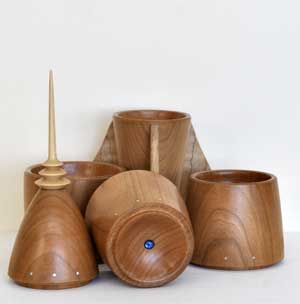
Five stage rocket box, open.
The five stages disassembled, showing one of the blue paua shell cabuchons set into each of the lids.